
Keeping succulents is a satisfying pastime because they do not require much specialist equipment to grow. Instead, the biggest factors in determining how well a succulent grows are a thorough knowledge of its environment and a willingness to make the effort to understand it’s natural habitat and how this comes to effect it’s requirements as it is growing.
One of the most satisfying things about propagation is how easy it is if you follow these natural processes. Succulents are specially adapted to their particular habitat and their natural behaviour in the wild has helped them survive as a genus over many thousands of years in conditions which would be inhospitable to most plants, so it is important to bear in mind the unique adaptations of your echeveria and the fact that they do not necessarily need the same conditions as other houseplants.
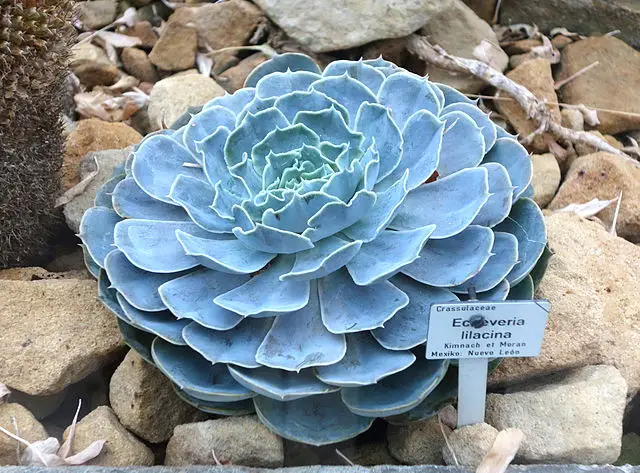
Echeveria lilacina can also be grown from seed although this is not advised for novices due to the delicate nature of the seeds and seedlings which need specific conditions.
Echeveria Lilacina Propagation by Leaf Cutting
Leaf cuttings are one of the quickest methods of propagation and very simple. Use a similar type of potting compost as you would use for seeds and mix it with the succulent specific mixture of sand or sand and perlite (volcanic glass) to increase drainage in the soil and best recreate the natural consistency found in the plant’s habitat.

For propagation, new soil must be used for each plant and they should be placed in clean, individual pots to make it easier to transfer the leaf, once it has rooted, to a bigger pot later on. As with all echeveria the pot must allow for good drainage as this is one of the distinguishing factors of the soil in its natural habitat.
Select a healthy looking leaf close to the base of the plant and twist it carefully off the stem. It’s important to ensure this is done cleanly with no remnants of the leaf left attached to the base as otherwise roots will fail to grow. Initially, place the leaf on a sheet of paper in a dry location which is free from humidity – a condition which many echeveria hate.
It should be placed close to daylight but not in direct sunlight. This is to allow the natural process such as callusing to take place which is where the leaf heals over, creating scar tissue which protects the plant from infection whilst it is growing roots and new leaves.

It is also important that the leaf is left to dry as excessive water is one of the main factors in bacterial infection for propagating echeverias as their arid environment in the wild means they are not adapted to such extremes of humidity. Once the leaf has healed you will begin to see it growing roots.

At first, the larger leaf provides the developing plant with all the nutrients and water which it needs, so it is not necessary to water the new plants at all until they have fully developed new roots and you can see a new plant with its own leaves beginning to grow.
Leaf Propagation Conditions
During this time it should have access to daylight and be kept in a dry and warm location to best recreate the conditions in its natural habitat, but it should not be placed in direct sunlight as this is too intense for it. As the new plant develops you should see the older leaf begin to shrivel and wither which is a sign that the new plant is using up the nutrients there.
This is a natural process and is absolutely fine because the young plant is getting all the nutrients and water which it needs. It is only when the larger leaf is fully dried up that you should begin watering.
Propagation by Offsets
Whereas propagation by leaf has come about from the natural processes which happen after a parent plant loses a leaf in the wild, offset propagation is the process by which parents plants create new plantlets. Offsets grow around the base of the stem and are genetically identical to the parent plant. Therefore, if you like a particular plant, offsets are a great way of maintaining and replenishing its genetics through the natural processes which it uses in the wild.
As with leaf cuttings, it is important that when separating an offset from the larger plant that this is done in such a way as to prevent infection. Offsets are joined to the larger plant by a stem and after this has been cut it is important to let the plant sit in a dry area without humidity so that the cut area can callus over and the plant therefore develops a defensive layer against infection.

It’s best to select a well-established offset which has been growing for a few months and appears strong and healthy because these are therefore highly likely to thrive and flourish in their new environment. Unlike leaf cuttings, offsets can be planted straight away into clean, new soil as they have already formed roots. They should be placed in a light, dry location, but not in direct sunlight and not close to radiators.
Echeveria Lilacina Growing from Seed
If you apply a patient and methodical approach to growing echeveria lilacina from seed you will end up with a fine collection of healthy succulents, although several things should be noted for the beginner succulent grower which make growing echeveria lilacina from seed more challenging than leaf or offset propagation.
The first is that the seeds of echeveria lilacina – like all plants in the echeveria genus – are extremely fine and can even be mistaken for dust if you are not careful. Therefore when gathering them, this should be done carefully and the seeds should be gathered against a background which is of a different colour – ideally something paler, which means they will show up and they can then be transferred to the soil to be planted and grow.
Ideal Conditions
When you are ready to plant the seeds, prepare a container. The container should be between 3-5 inches deep at this stage, to allow for future growth and for sufficient drainage, which is very important for echeverias – like all succulents – due to their arid environment – and seedlings especially do not tolerate overwatering.
One large tray for all seeds is fine. To improve drainage you can line the base of your container with a thin, mixed layer of small stones and grit and then cover with a suitable substrate (under layer) soil. There are many varieties available and the purpose is to maintain air and enable a good uptake of nutrients, so a more porous soil is better. Some subsoils contain pine bark or coconut coir, leaf matter or finely shredded bark.
Your next layer of soil should be a good quality potting soil combining 50% loam and 80% coarse sand and it should feel slightly grainy to touch which ensures good air content and allows for drainage. Finally, mixing in the combination of sand and perlite which is good for all arid and semi-arid succulents ensures that the soil does not become waterlogged. Leave at least 1 inch free at the top for growth for when seeds begin to germinate.
Step by Step Growth
Lay each seed individually on top of the soil, at least one-two inches apart. While this may seem painstaking, the seeds are so small that if they are scattered, or even using a fine brush to distribute them on the soil surface, this could result in seeds becoming too close together which could inhibit development and can cause damage when they are repotted at a later stage.
The ideal temperature for germination is 70°F (21°C) and at night this should be around 68°F (20°C) – 66°F (18°C). Once you have placed all the seeds on the soil, give them a fine spray to water them, as the soil should be moist, but not sodden – although at this stage it should not be allowed to dry out completely in the same way as you would an adult plant. Germination should start at around four days and be evident after about two weeks.
Place the container where it has access to daylight but not in direct sunlight as this is too strong for the developing plants.
Conclusion
In conclusion, propagating echeveria lilacina creates varying levels of challenge depending on the method you use and how much experience you have growing and propagating succulents. However, with the proper understanding of the plant’s natural processes, echeveria lilacina can be grown successfully both from seed and through propagation – although for your plant to optimally thrive, it’s natural habitat must be carefully recreated through its soil and the other conditions in which it is grown
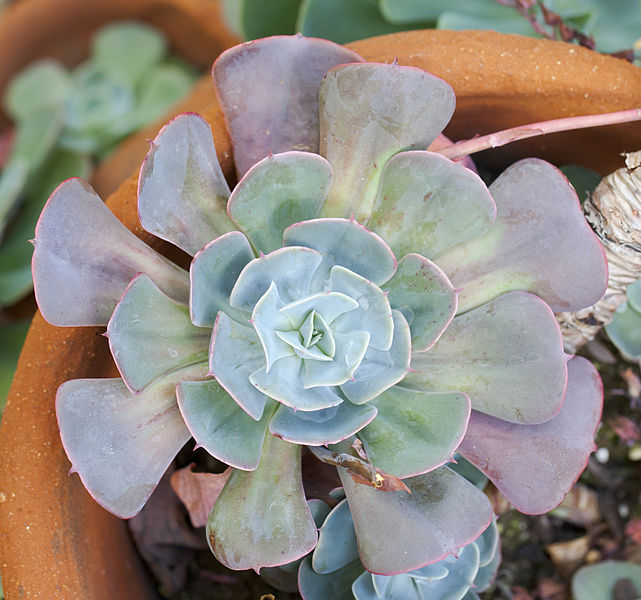
Featured Photo Author: Diego Delso