Introduction
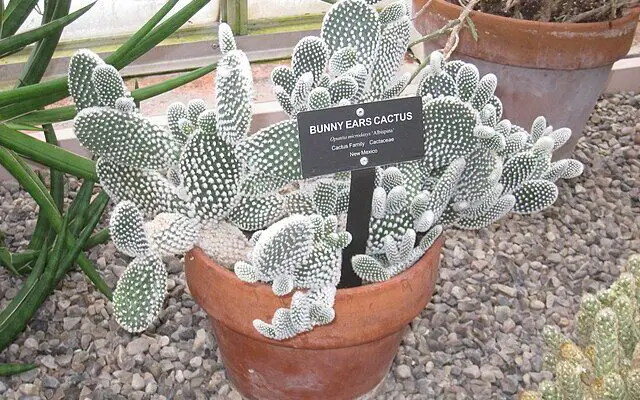
The Bunny Ear Cactus, scientifically known as Opuntia microdasys, is a distinct and fascinating succulent, beloved for its unique appearance and low-maintenance nature. This guide delves into the essentials of growing Bunny Ear Cactus, with a special focus on propagation and soil requirements, ensuring enthusiasts can cultivate this charming plant with confidence and success.
Understanding Opuntia microdasys
Native to Mexico, the Bunny Ear Cactus is characterized by its flat, rounded cladodes that resemble the ears of a rabbit. The cactus lacks traditional spines but features numerous glochids – tiny barbed bristles that can easily detach and irritate the skin. Its green pads turn a purplish hue in cold temperatures, and in spring, it blooms with yellow flowers.
Ideal Growing Conditions
Bunny Ear Cactus thrives in bright, indirect sunlight. Direct exposure, especially in hotter climates, can cause sunburn. Indoors, a south-facing window is ideal, but ensure the plant receives at least 4-6 hours of light daily.
Is Bunny Ear Cactus an Indoor or Outdoor Plant?
The Bunny Ear Cactus (Opuntia microdasys) is versatile in its growing environment and can thrive both indoors and outdoors, depending on the climate and care provided. Understanding the conditions it prefers will help determine the best location for this unique plant.
Outdoor Growing
In its natural habitat, Bunny Ear Cactus is accustomed to the outdoor climate of arid regions. It can flourish outdoors in similar conditions, particularly in USDA hardiness zones 9 to 11. Here are some considerations for outdoor growing:
- Climate: This cactus prefers warm, dry climates. It can tolerate high temperatures but needs protection from extreme cold and frost.
- Sunlight: Outdoors, it requires plenty of sunlight. However, in very hot climates, partial shade during the peak afternoon sun can prevent sunburn.
- Soil: If planting in the ground, ensure the soil is well-draining. Amend garden soil with sand or other gritty materials if necessary.
Indoor Growing
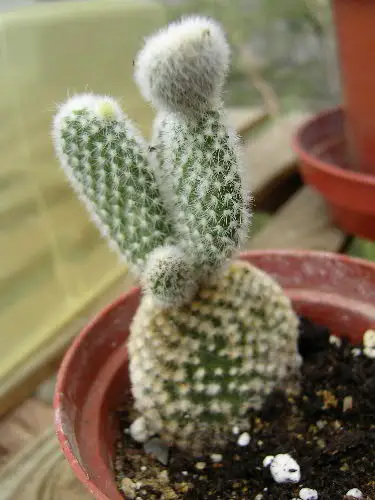
Bunny Ear Cactus can also adapt well to indoor environments, making it a popular houseplant. Indoor growing allows for more control over the conditions:
- Light Requirements: Place it in a location where it can receive several hours of bright, indirect sunlight daily, such as near a south-facing window.
- Temperature Control: Indoors, you can easily maintain the warm and dry conditions it favors. Avoid placing it in drafty areas or near heating and cooling vents.
- Watering and Humidity: Indoor air, especially in homes with central heating or air conditioning, can be dry, which suits this cactus. Water sparingly, allowing the soil to dry out completely between watering.
Factors to Consider
- Space: Outdoors, Bunny Ear Cactus can grow larger and spread more freely. Indoors, its growth is somewhat limited by pot size.
- Pests and Diseases: Indoor plants may be more susceptible to pests like mealybugs. Regular inspection and maintenance can keep these issues at bay.
- Aesthetics: Indoors, this cactus adds a unique aesthetic element to home decor. Outdoors, it can be a part of a desert-themed garden or rockery.
Temperature and Humidity
This cactus prefers warm, dry climates, ideally between 70-100°F (21-38°C). It is not frost-tolerant, so if temperatures dip below 50°F (10°C), it’s crucial to bring it indoors. Humidity should be low; a typical household environment suffices.
Watering
Overwatering is a common pitfall. Water only when the soil is completely dry, typically every 1-2 weeks in summer and less frequently in winter. Use a container with drainage holes to prevent water logging.
Bunny Ear Cactus Soil Requirements
Importance of Soil Composition
The soil composition plays a pivotal role in the health and growth of the Bunny Ear Cactus (Opuntia microdasys). This plant, like many cacti, is adapted to thrive in arid environments, necessitating a soil mix that closely mimics its natural habitat. The ideal soil mix for Bunny Ear Cactus needs to provide several key elements:
- Excellent Drainage: The primary requirement is rapid water drainage. Cacti are susceptible to root rot, a condition often caused by stagnant water in the soil. Therefore, a well-draining mix is essential to prevent water from accumulating around the roots.
- Aeration: Soil that allows air to reach the roots is crucial. Aeration prevents the roots from suffocating and promotes healthier growth.
- Nutrient Balance: While cacti don’t need nutrient-rich soils like other plants, they do require some level of fertility to support their growth.
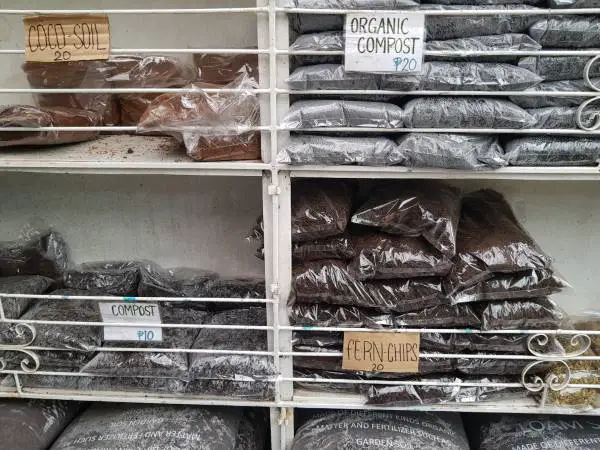
Creating the Ideal Soil Mix
While commercial cactus or succulent mixes can be used, creating a custom blend allows for greater control over the soil properties. Here’s a closer look at each component of the suggested mix:
- 60% Regular Potting Soil: This acts as the base of your mix. Regular potting soil contains organic matter, which provides nutrients to the cactus. However, on its own, it may retain too much moisture for cacti.
- 40% Gritty Material: The addition of gritty materials is what sets cactus soil apart. These materials increase the drainage and aeration of the soil. Choices include:
- Coarse Sand: This improves drainage and adds weight to the soil, helping to anchor the plant. It’s important to use coarse sand rather than fine sand, which can compact and hinder drainage.
- Perlite: A volcanic glass that’s been heated and expanded, perlite is lightweight and improves both drainage and aeration. It also helps to keep the soil mix porous.
- Pumice: Similar to perlite, pumice aids in drainage and aeration but is more durable and retains some moisture and nutrients.
Mixing and Using the Soil
Combine the regular potting soil with your choice of gritty material in the 60/40 ratio. Mix thoroughly to ensure even distribution. When potting your Bunny Ear Cactus, ensure the pot has sufficient drainage holes. After repotting, it’s advisable to wait a few days before watering to allow any disturbed roots to heal.
Maintenance Tips
- Soil Refreshment: Over time, the soil can become compacted or depleted of nutrients. It’s beneficial to refresh the soil every few years to maintain its quality.
- Monitoring Soil Conditions: Regularly check the soil’s condition. If it seems to retain moisture for too long, consider adding more gritty material to improve drainage.
By understanding and implementing these soil requirements, you can create an optimal growing environment for your Bunny Ear Cactus, ensuring it remains healthy and vibrant.
Bunny Ear Cactus Propagation Techniques
Propagating Bunny Ear Cactus (Opuntia microdasys) is a rewarding process that can be achieved with pad division. This method replicates the natural way these cacti spread in their native habitats. Here is an expanded step-by-step guide:
Pad Selection
- Choosing the Right Pad: Select a healthy and mature pad from the mother plant. Look for pads that are firm, free from any signs of damage or disease, and have a robust green color. The pad should be at least 6 months old to ensure it has accumulated enough energy reserves for optimal root development.
Separation
- Detaching the Pad: Carefully twist the selected pad off the plant. It’s important to do this gently to avoid damaging both the mother plant and the pad. Using tongs or wearing thick gloves is advisable to protect yourself from the cactus’s glochids, which are tiny, hair-like spines that can easily detach and irritate the skin.
Curing
- Callusing Process: After separation, place the pad in a dry, shaded area to allow the cut area to dry and form a callus. This process typically takes about a week, depending on the humidity and temperature of the environment. The callus formation is a critical step to prevent potential rot when the pad is planted.
Planting
- Soil Preparation and Planting: Once the pad has formed a callus, prepare a pot with well-draining cactus soil. Plant the callused end of the pad about 1 inch deep into the soil, ensuring it stands upright. The right soil composition and pot with good drainage are essential for successful rooting.
Watering
- Initial Watering: Water the soil lightly to make it slightly moist, but not waterlogged. This initial moisture is important to encourage root growth. However, avoid overwatering, as this can lead to rot. In the first few weeks, monitor the soil moisture and only water when the top inch of soil feels dry.
Growth Monitoring
- Observing Root Development and Growth: Patience is crucial during this stage. It can take several weeks to a few months for roots to develop and new growth to appear. Avoid moving the plant frequently and keep it in a stable environment with consistent, indirect light.
Additional Tips for Successful Propagation
- Best Time for Propagation: The ideal time for propagating Bunny Ear Cactus is during its active growing season, which is usually in the spring or early summer. This timing gives the new plant the best chance to establish itself before the cooler, dormant winter months.
- Handling Offsets: Sometimes, Bunny Ear Cactus will naturally produce small offsets or pups. These can also be used for propagation following a similar process. Just ensure these offsets have formed their own roots before separating them from the mother plant.
By following these detailed steps and providing the right care, you can successfully propagate your Bunny Ear Cactus and enjoy the growth of new plants. Remember, each cactus pad has the potential to grow into a new, full-sized plant, making propagation an exciting aspect of cactus gardening.
Pruning and Maintenance
Pruning is not typically required for Bunny Ear Cactus. However, if a pad is damaged or diseased, it’s best to remove it to prevent any spread. Simply cut it off at the base using a sterile knife.
Addressing Growth Issues
Bunny Ear Cactus Wrinkled
Wrinkling in Bunny Ear Cactus is often a sign of dehydration. This can be due to infrequent or insufficient watering. To address this, establish a consistent watering routine, allowing the soil to completely dry out between watering sessions.
Bunny Ear Cactus Dying
If a Bunny Ear Cactus is dying, it’s crucial to quickly identify the cause, which could be overwatering, under-watering, pest infestations, or disease. Inspect the plant thoroughly, especially the roots for rot, and adjust care practices accordingly.
Bunny Ear Cactus Etiolated
Etiolation in Bunny Ear Cactus occurs due to inadequate light, leading to stretched, pale growth. Improve the lighting conditions by placing the plant in a brighter spot with plenty of indirect sunlight.
Bunny Ear Cactus Shriveling
Shriveling in Bunny Ear Cactus can be a result of either overwatering or underwatering. Check the soil’s moisture level to determine the cause. Ensure the cactus is in well-draining soil and adjust your watering schedule as needed.
Bunny Ear Cactus Turning Yellow
Yellowing of the cactus can be due to overwatering, poor drainage, or nutrient deficiencies. Make sure the plant is in well-draining soil, reduce watering, and consider using a balanced fertilizer during the growing season.
Bunny Ear Cactus Corking
Corking in Bunny Ear Cactus is a natural, age-related process where the lower parts of the cactus turn brown and woody. It is a normal aspect of the plant’s growth and not indicative of a problem.
Bunny Ear Cactus Disease
The most common disease affecting Bunny Ear Cactus is root rot, usually caused by overwatering. Prevent this by ensuring proper soil drainage and appropriate watering practices. Fungal infections can also occur, often manifesting as soft, discolored patches.
Bunny Ear Cactus Mealybugs
Mealybugs on Bunny Ear Cactus appear as small, white, cottony masses and can damage the plant by sucking its sap. Treat infestations with insecticidal soap or neem oil, and manually remove any visible bugs using a cotton swab dipped in alcohol.
Conclusion
The Bunny Ear Cactus is a delightful and easy-to-care-for plant that adds charm to any space. By understanding its basic needs and mastering the art of propagation, enthusiasts can enjoy the beauty and uniqueness of Opuntia microdasys for years to come. Remember, patience and attentiveness are key to nurturing this distinctive cactus.

