
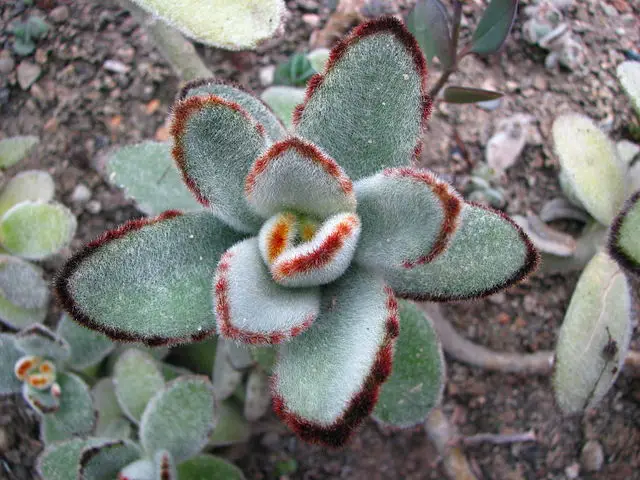
Kalanchoe tomentosa is a succulent with thick fleshy leaves, also known as Panda Plant, Chocolate Soldier, Cocoon Plant, Donkey Ears Plant or Pussy Ears. If you are looking for a perfect indoor succulent that’s perfect for any room? The wonderful panda plant is all you need. It is a quite famous houseplant due to the ease of care, small size, and red-rimmed foliage.
Being a succulent lover, I always like to have a few Panda plants in my collection. It grows very well indoors and makes a great plant for beginners. Are you already growing the Panda plant and would like to have more of them standing at your house? You don’t necessarily have to buy new Panda plants frequently. Instead, you can try to propagate your Panda plants from the existing specimens, which is a cost-effective and easy way to produce many new plants.

For the beginners, propagation might not be an easy task to do. You might have to face failures many times. As even after completing the propagation process with success your plants might fail to grow and you have to repeat the whole process. In that case, you need to do some troubleshooting to find the possible problems or malpractices you may be doing. After a few attempts, you will be able to propagate your Panda plants successfully at home.
Here I’ll share a complete guide on how you can propagate these wonderful succulents indoors or outdoors. You must read these guidelines through the end for successful results.
Kalanchoe tomentosa propagation
How Panda plants can be propagated? Panda plants can be easily propagated from leaf and stem cuttings.

You need the following things to start the process of propagation:
- Scissors to prepare leaf or stem cuttings
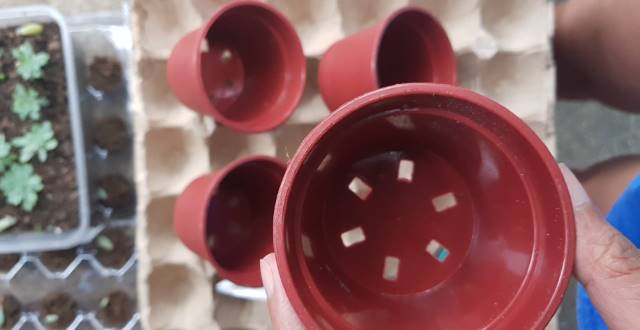
- Clean pots
- A potting mix
- Clean water in a vessel
How to take the leaf and stem cuttings?
These plants are always fun to grow from stem or leaf cuttings. If you want to get successful results of propagation, make sure you are cutting the plant parts in the right way.
How to take a leaf cutting? Gently, cut the leaf from the stem, and make sure that no part of the leaf is left on the stem. You may need to pluck several leaves from your plants. Avoid taking too many leaves as it will weaken your plants, and if you take just one leaf it may not develop roots properly and you might have to repeat the whole procedure of propagation.

Always choose healthy leaves for taking leaf cuttings. Don’t remove those leaves that are showing visible signs of damage or fungal growth
How to take cuttings from the stem portion? The vegetative stems start quickest rooting and produce the best plants. Choose a stem that has no flower growth. Cut cleanly 2 to 3 inches (approximately 5-7cm) long stem sections and snip off a couple of leaves from the bottom.
Place the leaves or stems in an empty clean pot for a couple of days at a warm dry place to develop callous. The callous will develop at the cut flesh of the stem and leaves and prevent the cuttings from rotting in the growth medium.

Propagation should always be done in the spring or summer season when the climatic conditions are optimal for the growth and development of these plants.
What are the things you must keep in your mind while taking cuttings from your plants?
⦁ Always take cuttings from healthy and disease-free plants.
⦁ Don’t cut the plants hastily to avoid any injury or damage to the plants.
⦁ Always cut the desirable plant part only.
⦁ Use sharp tools to cut your plants as unsharpened tools can cause injuries.
Soil or potting mix
How to prepare a potting mix? You can prepare a soil mixture by mixing equal parts of sand, peat moss, and perlite to make a suitable growth medium for propagation. You can also use a standard succulent mixture available in the market.
Take a sterile pot with a drainage hole for proper drainage of excess water, add the soil mixture, and water the soil lightly. Watering must be very light to make the soil slightly damp avoid standing water as it can be very damaging. The size of the pot depends on how many cuttings you are planning to plant per pot. One cutting per pot is recommended for 3 to 4 inches pots, 1 to 2 cuttings per pot for 5 inches pots, and 1 to 3 cuttings per pot for 6 inches pot.
How to propagate Panda plants?
Propagating Panda plants is very simple. Now you know all the pre-requisites of propagation, you just have to follow a few simple steps:
⦁ Remove the leaves or stem sections during the spring or summer season.
⦁ Let the cuttings dry for 5 to 7 days. Make sure not to let them dry for too long.
⦁ Take a clean pot containing the pre-moistened potting mix.
⦁ Make a hole at the surface of the soil and place the calloused leaf or stem cutting directly on the soil. Firm the soil around the cutting to provide better upright growth to the plants.
⦁ Start light watering immediately to promote faster growth.
⦁ Keep misting the cuttings several times a day.
⦁ Cover the pots with polyethylene sheets to retain the moisture for a few days.
⦁ Keep the containers under indirect bright sunlight. Avoid exposure to intense sunlight.

The cuttings will start to develop roots within four to five weeks. You can check for the development of roots after 2 weeks. Gently pull the cuttings, if you feel some sort of resistance it will indicate the root growth.
Now you have a new actively growing Panda plant which you will have to transplant to a new pot containing standard succulent soil mixture. After transplanting provide necessary care to the plant just like the original plant.
Care for Panda Plants after propagation
When you are done with the process of propagation, don’t think you are done with everything. Don’t leave your plants unattended as your plants need extra care for the first few weeks. If you fail to care for your plants you might fail to get successful results.

After completing the process of propagation, keep your pots under observation and provide the necessary care to ensure healthy growing new plants. If you fail to provide the necessary care your efforts will go in vain.
Water requirements
After placing the cuttings in the pot keep providing light watering so that the cuttings or the surface soil remains moist. The misting frequency should be more at the starting point with several times a day. Reduce the misting frequency after a week once the cuttings start to establish. When the top 1 inch of the soil becomes dry water the plants immediately. Always allow the soil to dry completely before applying the next water. But don’t make the soil too damp as these succulents are sensitive to overwatering.
Panda Plants generally grow well outdoors in areas with low rainfall. However, if you are living in an area with high rainfall keep your Panda plants indoors as too much rain can damage or kill your plants.
Light requirements
Keep your containers at a spot that has a lot of indirect sunlight with an average temperature of about 70 °F. You can keep your containers near a window that gets ample sunlight. Avoid the exposure of cuttings to intense direct sunlight as it will hinder the normal growth of roots
If you want to keep your containers outdoor try to keep them at a spot that gets dappled sunlight or under a shady place.
Potting and Repotting
Once the cuttings have started rooting, they are ready to be transplanted. When the roots reach about 1 inch (2.54 cm) in length, transplant the new growing plants into separate pots. The pots should be large enough to allow the development of new roots. Always use sandy soil mix for potting or repotting your succuelnts.
After transferring the plants to new pots treat them as seedlings for a few weeks to ensure better establishment in the growth medium. Avoid placing the plants under direct sunlight and drought conditions. Once the plants are established you can place them home as desired.
Panda plant is a slow-growing succulent it needs to be repotted every 2 years and less frequently once it matures. Proper drainage is necessary, so place a thin layer of clay pot pieces at the bottom of the containers. You do not need to use a container larger than five inches (13 cm) for repotting your plants.
Featured Photo Credit :Agnieszka Kwiecień, Nova / CC BY-SA